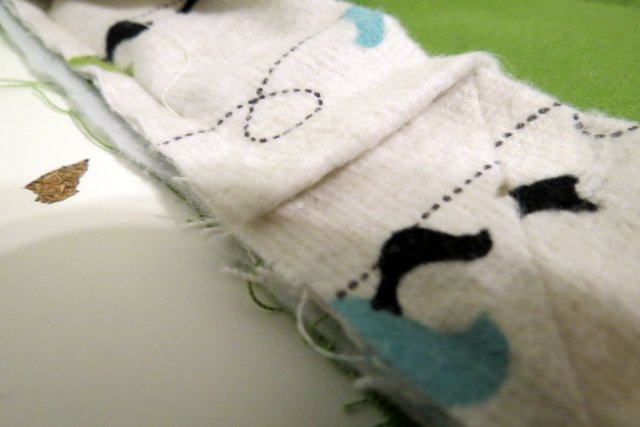
My beautiful Mother's birthday was June 2nd so this meant another sewing project of course. As some of you know I made her an
apron for Mothers Day so I wanted to make her something that would match. I ended up deciding to go with a hot pad. I was looking at the hot pad that I had in my kitchen and realized that it really was just a mini quilt. One of the beautiful things about knowing how to sew is that you can look at pieces, realize how they made it, and then make it your self. If you are new to quilting or just interested in trying quilting a hot pad is a great place to start because all the fabric on a quilt can be very overwhelming.
Hot Pad Tutorial
What you Need
If you made the apron you can just use the scraps and supplies you have left over!
Make sure and get 100% cotton or heat resistant fabrics no synthetics that burn.
- Large enough scrap for main portion of the hot pad
- Scrap for applique bird
- Heat N Bond fusible paper
- Long strips for cream bird binding
- A small piece of quality batting
- Matching Thread for each type of fabric
- Paper and ruler to create the pattern
- Scissors
- Sewing Pins
- Safety Pins
- Bobbins
- Seam gage
- Sewing Machine and Iron
The Planning
To begin you need to decide how big you want your hot pad to be. This could depend on what you want to use your hot pad for or what you want to applique onto the hot pad. For me I was trying to find a size that would look good with my bird. So I decided to test out different sizes by measuring and cutting them out on printer paper.
Another thing you have to consider is that you with have a binding around this piece as well. So you need to decide how thick you want your binding and take that into account. I used a 1/2 inch binding around my hot pad. That is all you need to do for planning it is pretty basic.
Cutting Out
The cutting out for this project is pretty basic just straight lines besides the applique piece. For the green portion I just used the piece of paper that I had planned with as my pattern piece. You need two pieces so make sure to either cut the piece out on folded fabric or cut two pieces. I first made sure that it was on grain. Grainline is important as fabric is created with two different threads (warp and weft) and it is important the pattern piece is aligned with one of these threads so the fabric will lay correctly.To ensure that a pattern piece is cut out "on grain" you simply measure from a grian line on the pattern or a straight line on the pattern to the edge of the fabric and ensure the entire pattern piece is equal distance from the line to the edge of the fabric. If you are measuring to the salvage edge you are measuring lengthwise grain line which is the most commonly used grainline.
Once the piece is on grain you can carefully pin and cut put your pieces.
Next you cut out the batting piece. You only need one piece of batting. When making a quilt you want the batting and the back piece to be a little larger than the front so you do not have to trim off your beautiful front portion. I did not make the back bigger for this project but I did make the batting bigger by placing the same pattern piece on the batting and then cutting with extra space around the piece.

The next step is to cut out your binding pieces. I used the french fold binding method. It is best to cut binding strips on the bias when possible though I cut these lengthwise.When using the french fold method you times the desired finished thickness of your binding by 6. So I wanted 1/2" binding so I needed to cut 3" strips. So I made a pattern and cut strips out with my Ginghers. If you have a cutting board and rotary cutter just cut three inch strips with your rotary cutter. To determine how long your strips need to be just measure around your hot pot and add 4" for the mitered corners and finishing purposes. You do not need to cut one continuous strip I show you how to combine strips below.
For the applique birds I used Heat N Bond that I bought at Walmart for a few dollars. The package has pretty great instructions but I will explain what I did. First iron one side of the Heat N Bond to your fabric and then you trace and cut out your design.
Now everything is cut out!
The Sewing
The Sewing is divided into two parts, First the applique and Second the Binding.
The Applique
Take the cut out applique design and peel away the paper revealing a shinny glue.
Carefully center this onto your top hot pad piece and then press using minimal stem.
Now you need to make your "quilt sandwich" (as my professor would say). Place your now appliqued piece (the bottom piece) right side down. Then place your batting piece and finally the appliqued piece with the right side up. Making sure that there is batting sticking out on all sides.
Now pin the layers together using safety pins. Why safety pins? Well when you are making a large quilt you will need to pin all over the quilt and move it and work with it and you don't want to get pricked by those sharp pins.
Now you are ready to edge stitch around the bird. To edge stitch you try to stitch as close to the edge as possible. It sounds easier than it is, try to find a spot to train your eye like a line on the presser foot or machine and sew slow especially on curves. If you are nervous practice on a sample.
The bird with the edge stitching.
Now that the edge stitching has glued the layers together you can trim the excess batting to prepare the piece for binding.
The Binding
The first thing you need to do is combine the binding strips if you have multiple strips. To do this you overlap the the ends of your strips right sides together forming an L making sure to match edges as below.
Now you place a diagonal line across one of the strips using a ruler and tailor's chalk.
You then pin the two pieces together making sure the edges are still lined up. And then use the chalk line as your stitching line.
Creating a diagonal seam instead of a straight one. Press the seam open.
And trim down the seam allowances.
Repeat until you have combined all of your pieces. I only had to do this once since the hot pad is so small but for a real quilt you do it over and over again. When all pieces are combined fold and press your strip in half.
Now you are ready to figure out your seam allowance for your binding. To do this carefully pin the binding strip to the back of the hot pad part placing the pin where you think the seam allowance should be matching edges.
Now fold the strip over to the right side and see if the strip covers the pin. In the picture below the strip does not cover the pin. This means your seam allowance is too wide because we want the strip to cover the pin as this will mean your future stitching will be covered.
Once you have figured out your correct seam allowance (usually a little less than the desired binding width to account for the turn of cloth) use page two of this
french binding tutorial (also great if you get confused in my binding section) by lily street quilts to start your binding until you reach a corner. At the corner measure in from the edge the amount of your seam allowance and place a pin there.
And then stitch from the start to the pin stopping at the pin not sewing to the edge.
Now fold the binding back on top of the already sewn binding.
Then fold the binding up vertically creating a diagonal fold.
Then fold the binding back to match up with the edge of the hot pad that it has not been sewn to.
Now pin the other side placing a pin marking where you need to stop on the next corner and stitch and repeat the folding method on each corner. Once you get back to the beginning.
Trim the binding so it is about a 1/2" overlapping the folded pocket that you created at the beginning.
And then tuck the end into the pocket and finish the stitching of the binding.
Now the binding has been successfully sew to the back of the hot pad you can fold the binding over to the front and start pinning it to the front making sure to measure as you pin so that you have even binding.
Then edge stitch around the binding...
And you have a completed hot pad!
As always if you have any questions or found this useful please comment! And follow if you would like to see more of my tutorials!